(TL;DR: if you just want to know how to make ChameleonPI v0.3 work with BerryBoot, jump here)
My Raspberry PI
The Raspberry Pi is a low-priced small computer-in-a-board, built for those who want to tinker, learn and have some geeky fun. The overall experience is quite reminiscent of the hobbyist 8-bit personal computer age – it may be more than a coincidence that the project shares British origins with the Sinclair ZX81/Spectrum and the BBC Micro.
Like many of today’s smartphones and low-power devices, the Pi uses an ARM CPU. This is a fun fact because that architecture was created by Acorn, the very same company that built the original BBC Micro! (the “Model A” and “Model B” boards are a clear pun on the BBC Micro models.)
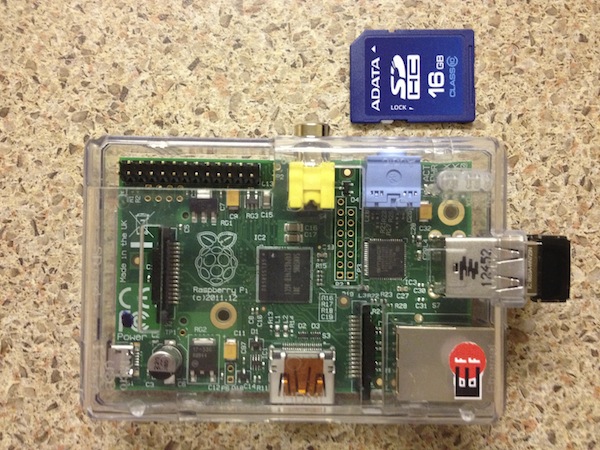
Here is my Pi, close to an SD card (to give an idea of its size). Yes, it’s a full-fledged computer.
Like those old computers, you’ll use any TV or monitor (with its HDMI or composite input), and can play around without fear of breaking them, thanks to the absence of moving parts and the low price. But unlike them, you use SD Cards for storage. They are the dream of the 80′s hobbyist: fast and interchangeable like cartridges, reusable and manageable like floppy disks, and as cheap as cassette tapes (you can find a a 16GB Class 10 for less than $15).
Here is a cost breakdown (in CAD): I spent less than $50 on my board (here), and $10 on the case from the photo (although you can get creative and spend more/less). I used HDMI cables and a microUSB charger I had here (minimum is 700mA; I’d suggest at least 1A), but had no keyboard/mouse lying around, so I got this mini keyboard with trackball (which works fine, but is so short-ranged that defeats the purpose of being wireless).
A cheap Wi-Fi dongle got me wireless for another $15. It all depends on what you already have on your house, but you won’t spend more than you would on, say, an Apple TV – which provides a bit more of convenience, but a fraction of the functionality and pretty much none of the DIY fun.
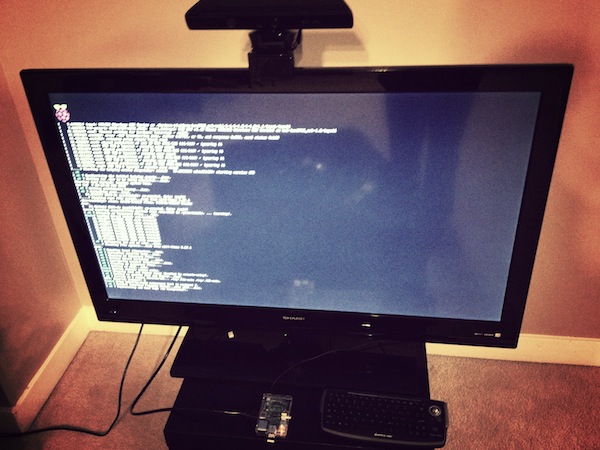
Terrible photo, but a milestone: first boot!
The recommended software to start with is Raspbian, a desktop-like Linux distribution to which you can add anything you want. But several custom-build distros were created for specific applications, like OpenELEC (a powerful XBMC-based media player) and Sugar (containing the educational software that runs on the One-Laptop-Per-Child machines).
But the nerdgasms came with ChameleonPI – a collection of emulators for dozens of old-school platforms. Apple II, MSX, ZX81, Spectrum, C64, Arcades (MAME), GameBoy, NES… you name it, ChameleonPI has it. Just throw your ROMs/DSKs/TAPs (or a willingness to write BASIC code) and have fun!
Swapping cards is easy, but can be cumbersome and waste space, which makes BerryBoot useful: it hosts multiple distros on the same SD Card, showing a (customizable) menu for you to pick them. It also downloads most of the popular ones, straight from the Pi, with a couple of clicks. Linux geeks: it’s like apt, but for distros!
Unfortunatelly BerryBoot does not support ChameleonPI. You can add it manually (following the instructions), but BerryBoot expects a two-partition distro (and only uses the second, as the first one is the always the Raspbian boot partition). ChameleonPI v3 added a third one, allowing non-Linux users to copy ROMs to the SD card.
Since I’d rather use Wi-Fi to copy anyway, I tried to go without it. However, some of the emulators (notoriously LinApple) missed the directory structure – and I also could not write to /roms (the mount point for the partition). Here is what I did:
Steps to add ChameleonPI v0.3 to a BerryBoot SD
-
Download ChameleonPI and follow the instructions to add a custom system (ignoring that you’ll see three lines instead of two on the first step; keep using the second one);
-
Extract ChameleonPI to a separate SD and create a .tar.gz file with the contents of the FAT partition – it’s the one with AUTOEXEC.* files on the root and a lot of directories with old computer names; (alternative: download my copy of the ChameleonPI v3 FAT partition)
-
Save that file to a pen drive/USB stick/external HD;
-
Plug the pen drive on the Raspberry Pi;
-
Boot the SD card with BerryMenu and select ChameleonPI.
-
Press T to open a terminal;
-
Ensure you can write to the /roms directory:
sudo chown zx /roms
-
Also make sure the mount point for the pen drive is there: (thanks @_47Ronin_ for pointing that out):
sudo mkdir -p /roms/USB
-
Type
exitto return to the ChameleonPI menu, then T again, and check if it mounted the pen drive (otherwise reboot and T again until the command shows some files):ls /roms/USB
-
Extract the .tar.gz file there:
cd /roms
tar -xvzf /roms/USB/chameleon.v03.fat.partition.tar.gz
-
Reboot again
If everything works, LinApple will allow you to select a disk image pressing F3 (instead of crashing for not having the directory where it expects). You will now also be able to connect via Windows Network to your Pi (use the user zx and password spectrum) and mount the roms folder, not the zx one.
Also be aware that these instructions were tested with ChameleonPI 0.3, not with 0.3.1 (which is giving me a hard time to mount anywhere outside the Pi).
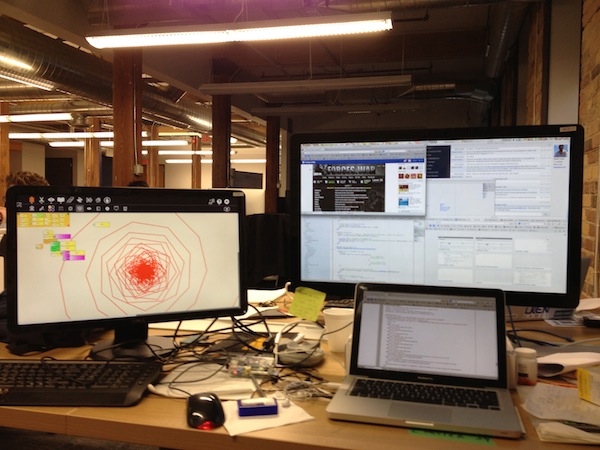
Yes, I brought the Pi to Uken – why not doing turtle graphics alongside Rails?
Tips and Tricks:
-
You can do the image conversion (the “instructions” of the first step) on the Pi itself – it is way slower than any Linux desktop, but will work if you leave it working during the night as I did – just apt-get the software mentioned
-
XBMC becomes way more useful when you add Fusion (so other plugins can be added via the network)
-
All distros recognized my Wi-Fi dongle on-spot, but configuring the network can be tricky. OpenELEC adds an option with its own name on XBMC, under “System”, but some distros will require you to add your network to wpa_supplicant.conf (BerryBoot has it straight on the setup menu, others will look for it in /etc/wpa_supplicant/).
In any case, adding a block like this to the existing file should be enough:
network={
  ssid="your_wifi_network_name"
  psk="your_wifi_password"
}
-
Make sure you set up the Wi-Fi (or have Ethernet plugged) because the Pi lacks a battery-backed clock, and needs to be online to show and use the correct date/time.
Comments
Felipe Seixas
Hi Chester,
Sorry about my ignorance, but what's the main difference between a Raspberry PI or an Arduino Uno? I would like to buy someone but I don't know for sure what could I do with each one!
With Arduino I know that I can do a lot of electronic stuffs, etc. But what about Raspberry PI?
Thank you!
chester
Both are small-scale "computers", but with different capabilities and focuses:
The Arduino has a simple microcontroller, which runs (relatively) simple code usually built on a PC for a specific task. Its strong point is interfacing with electronics: it has several ports that can act as input, output or oscilators for digital and analog components. If you need programmable "brains" for an electronics project (e.g., controlling a robot/LEDs, reading sensors, reacting to them), it is a wise choice, due to the lower price and sturdiness.
The Raspberry Pi has a full-fledged ARM CPU (not unlike the ones found on smartphones), which means it can run a Linux system and work as a cheap/low-power computer. It also has general I/O, but not as flexible or heavy-duty (electronically-wise) than Arduino's. On the other hand, it has standard PC connectors like HDMI, Ethernet and USB and way more computing power and RAM (256-512KB), making it suitable to work as a media center, a smart network device or the controller/computer board for more complex projects.
If you compare the specs (http://arduino.cc/en/Main/a... vs http://en.wikipedia.org/wik... you'll see that difference in CPU, RAM, etc.
Daniel
Hi i am trying to get this chameleon working with berryboot. I am using the v03 and your tar. Ive got chameleon running however im stuck at
Type exit to return to the ChameleonPI menu, then T again, and check if it mounted the pen drive (otherwise reboot and T again until the command shows some files):
ls /roms/USB
I have created the USB folder but my drive dont mount. Sometimes the USB folder disapear after i exit and i have to recreate it.
I can see the roms and zx folders in my windows pc through network but its empy beside the USB folder im creating in the Rpi.
Im a total noob to Raspbian (linux and programming overall) so im sorry if there is some obvious solution.
However i tried googling and mount the USB myself. I found this
sudo mount -t vfat /dev/sda1 /roms/USB
But as i start the rpi without the drive:
tail -f /var/log/messages
and putting it in i get
raspberrypi kernel: sda:
Im sorry for my low linux and english skills, hope you can help me, thanx =)
Daniel
i got it working, turns out it was just sda. Great guide, now i will play! :D
Chester
Glad you did it, sorry for not being able to answer before. Have fun!
megat
hi chester, can i use your method to install IPFire? because it is also known that IPFire is not supported by berryboot. thanks !
chesterbr
Hi! In theory any image of a distro can be added - I haven't downloaded IPFire, but looking around I don't see anything weird preventing it.
Most of these instructions deal with the fact that ChameleonPI has a non-usual partition scheme. Most likely all you'll need to do for IPFire is contained here: http://www.berryterminal.co... . Let us know if it works! :-)
megat
I've already tried the tutorial and asked around. I got stuck when "wait for devices used in fstab [FAIL]" appear. The moderator of IPFire said that it is not compatible with BerryBoot and somehow need to be tweak. I wonder if your tutorial will work. I'll try it tomorrow. Thanks Chester !
megat
Forgot to mention that the moderator said that i have to find the failing command inside the initskript.
val kir
Hello, can you please post a download link of the Chameleon fixed image i cannot do it my self,thanks
chesterbr
Hi! I'm on vacation right now (and don't have that dropbox account anymore), will try to rebuild that once I return. Sorry about that!
chesterbr
Anyway, taking a look I see ChameleonPI has not been updated in a few years, so it may not even be worth trying to fit it into your BerryBoot. I'd suggest trying something like RetroPie instead http://blog.petrockblock.co... , which has support for many more systems. Please let me know if that suits your interest better.