Our Wii U Gamepad’s analog stick was intermittently failing to register, causing frustration right when I most needed fun and happiness. Recalibration didn’t help, and a new Gamepad would be expensive, so I tested my luck by replacing the analog stick with an aftermarket one.
It isn’t a super complex operation, but the components are quite delicate, requiring gentleness and attention. As usual, here is what I learned (and some tips):
Parts and Tools
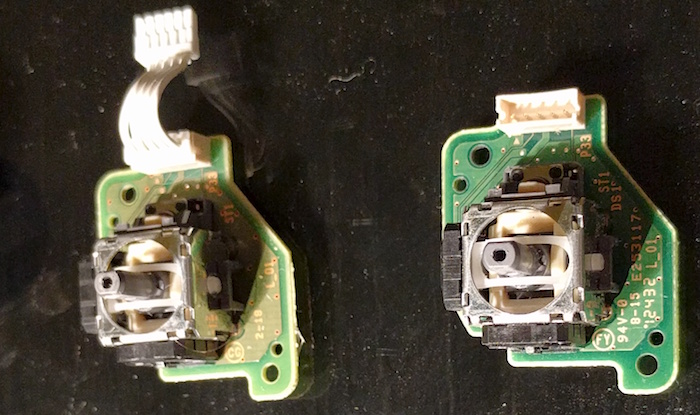
You can buy the replacement stick online for less than $5 (but keep in mind that the left and right sticks are different).
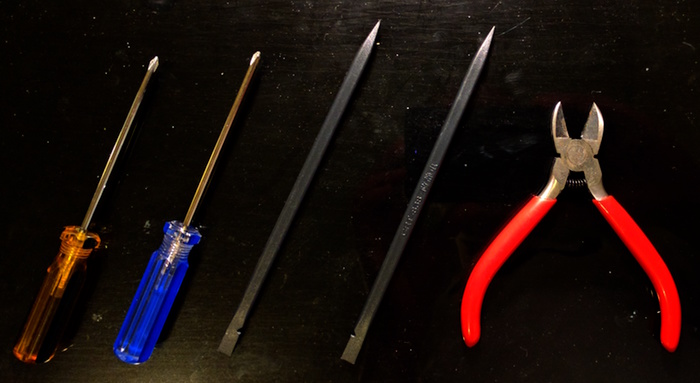
Other than that, these are the tools you should have:
- A Phillips screwdriver (for battery screws and white enclosure above controllers).
- A tri-wing screwdriver. Tri-wing screws are common on Nintendo hardware - some people call them “trigram”; I usually go with “@#%@ing Nintendo Y-shaped screws no one has”. Got mine on Amazon, but this one is likely to ship faster.
- Two spudgers - optional, but very useful to manipulate with the delicate parts. I purchased this cheap kit and enjoyed the extras.
- A wire cutter - you won’t actually cut wires, but it helps with the last connector (see below).
Replacement Tips and Tricks
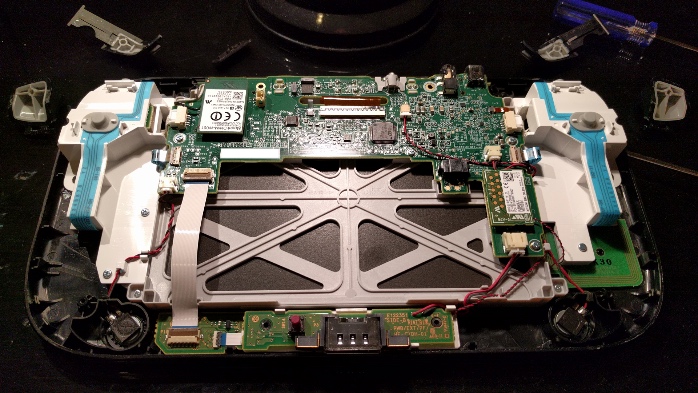
In short: remove the battery (and cover), open the unit (detaching the power cable), remove the white enclosure to reveal the analog stick board, and replace it. There are extra steps to replace the right stick, but I don’t know much about them, since I only replaced the left one.
I won’t go step-by-step - there are lots of tutorials online that you should check (I recommend the first two minutes of this video). But I learned a few things that may be useful to you:
-
You will notice that the analog stick sticks (pun intended) to the edge. Don’t worry: the original behaves just the same. The plastic parts on the controller will stop the stick before it reaches that far.
-
The battery connector is easy to unplug: just pull it towards you with a fingernail.
-
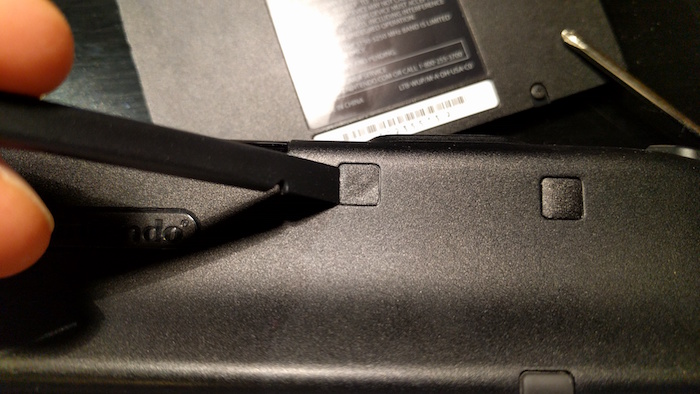
If you remove the screwdriver covers carefully using the spudgers and keep them with the glue side up on your desk, you will be able to put them back, so the controller will look like it was never opened. Use the spudgers in both operations, gently squeezing to unglue and remove, and pushing to align on the way back.
-
Be careful with the black-and-red cable as you lift the cover - the connector is hard to remove and easy to break. I unplugged it gently moving sideways (top-to-bottom, from Gamepad perspective). Took some time, but I didn’t figure out an easier way.
-
The connector on flat cable (connecting the white enclosure to the main board) is a ZIF. Those connectors are easy to open if you know how, but way easier to break if you don’t. Please read Step 1 of this page if you never dealt with ZIF before (or if you broke a few of them in the past, like I did).
-
When you reach the stick board, disconnect the white cable from the main circuit (so you can remove the old stick board), then disconnect the other end from the board itself (you will reuse it on the new stick board). This last connector was the hardest one for me. I ended up using a wire cutter, as described here.
-
The ZL and ZR buttons slide to the side once turned back (no need to wiggle like the guy in the video does).
-
You don’t have to remove the shoulder buttons (L and R) or the volume slider, but if you want to (or if they fall) it is ok: they are easy to assemble. Just ensure that the volume slider is actually sliding the little volume button on the circuit board before putting the cover back.
-
Don’t forget that that the Gamepad is upside down, which means the left sticker is on the right side, and vice-versa.
It was a bit scary to replace a Nintendo original component with such a cheap one (although they look nearly identical; check the photo above), but it worked flawlessly. Now I have no excuses (other than my own lameness) for letting my team down in Splatoon…
Comments
Mauro César dos Santos
Olá Carlos, meu nome é Mauro e estou escrevendo para te agradecer pelo mini truco para Android, um dos principais passatempos que não sai do meu celular
Nem acredito que um APP deste é de graça, muito obrigado.