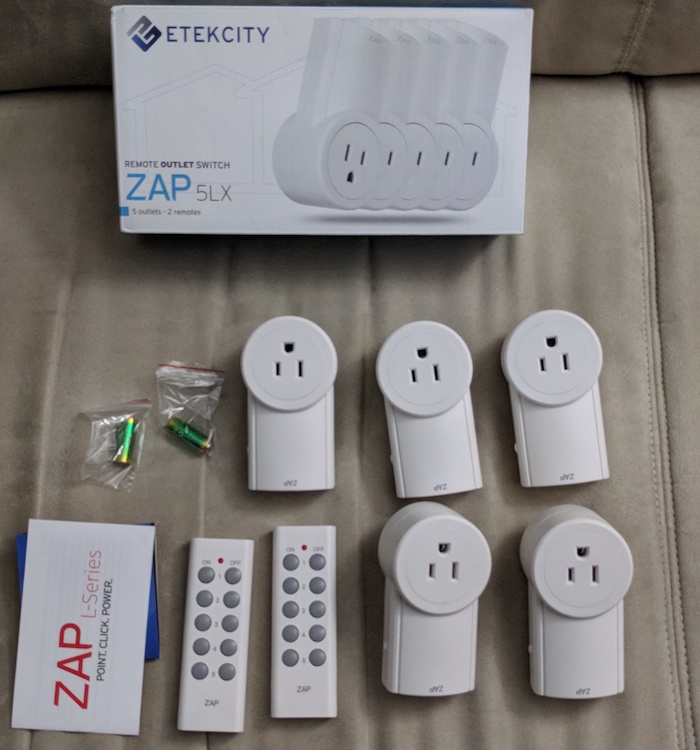
IKEA floor lamps aren’t bad - as long as your house has sufficient outlets with properly wired and positioned wall switches. Mine doesn’t 😐 and, being a renter, I can’t simply rewire them, so I decided to try the Etekcity RF-controlled outlet kit.
For less than CAD$ 60 you get five outlets, which can be turned on and off individually by the two included remotes. Not a bad deal, and sure an improvement from the odd switches (and the built-in ones on the lamps). But given I already control my TV and sound bar from Google Home with a Raspberry Pi, it wouldn’t be much of a stretch to also have voice control over the lights.

The TV/sound bar hack started with plugging an IR receiver to the RPi, so it could “learn” the IR frequencies for each button on the remote, and then an IR transmitter to simulate the remote buttons when the Pi gets a command from Google Home (via IFTTT).
This one worked roughly the same way, except that, instead of IR, I’d use a 433MHz RF transmitter/receiver pair, controlled by easy-to-use software from NinjaBlocks.
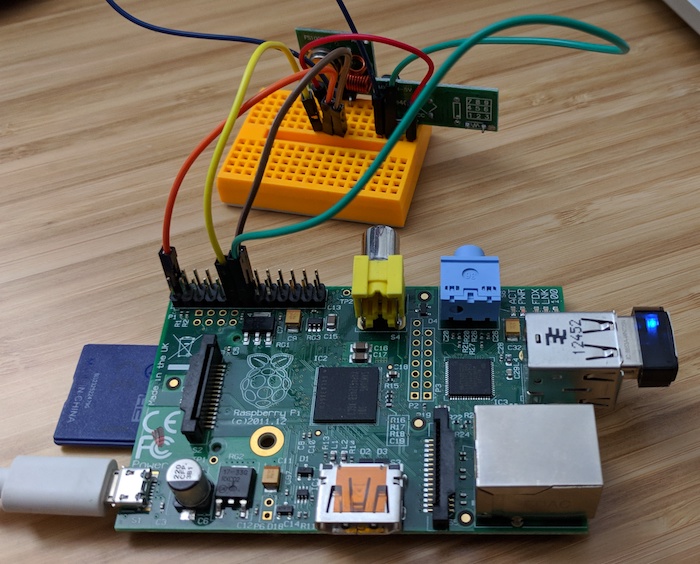
I mostly followed Kurt Tomilinson’s tutorial for the hardware part. In short:
- Wire GND on transmitter and receiver to any GND pin on the RPi;
- Wire VCC on transmitter and receiver to any 5V pin on the RPi;
- Wire the remaining transmitter pin (DATA) to RPi pin 11 (BCM 17) and either of the receiver remaining pins (they are connected) to RPi pin 13 (BCM 27);
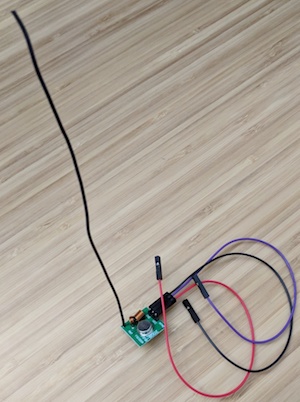
- Solder a 17.3cm wire (I used AWG 22, anything stiff will do) to the transmitter as an antenna.

Software-wise, we need to compile NinjaBlocks’ 433Utils so we have two utilities: RFSniffer (to learn the codes for each button on the remote) and codesend (to send those codes to the outlets at our will). The tutorial shows how to do that, but I added a couple twists:
- Instead of building the WiringPi library, we can install it from a package;
- Instead of running utilities as root (with
sudo), we can add the users that need to run them to thegpiogroup.
TL;DR: Here is how I set up the software on the Raspberry Pi:
cd ~
sudo apt-get install git wiringpi
git clone --recursive git://github.com/ninjablocks/433Utils.git
cd ./433Utils/RPi_utils
make
sudo mv ./codesend /usr/bin/
sudo mv ./RFSniffer /usr/bin/
sudo adduser $USER gpio         # so we can play on the command line
sudo adduser www-data gpio      # so the web server (nginx) can also send codes
With this, I could run RFSniffer and take notes of the numeric codes generated by each button on the remote. Having those, codesend NNNNNNN -l 200 simulates the keypress of the button matching code NNNNNNN for 200ms, allowing the lights to be controlled by software (and dispensing the receiver).
I already had a web server set up to securely run Lua code (see previous post), so I just cooked a function that, given a light number and a state (“on” or “off”) would execute codesend with the proper code:
light = function(which, state)
  -- no, those aren't my codes :-)
  codes_on = { 5538945, 2436560, 4296666, 8345444, 0212408 }
  codes_off = { 7152607, 1929488, 4714537, 8798718, 1585774 }
  if state == "on" then
    code = codes_on[which]
  elseif state == "off" then
    code = codes_off[which]
  else
    return
  end
  os.execute("codesend " .. code .. " -l 200")
end
Calling this when the server gets an HTTPS POST (once the secret and arguments are validated) allowed me to create create IFTTT applets that turn on/off individual lights (or all of them, with a simple loop) as I talked to Google Home. Check it out:
Of course, there are several ready-made solutions for this kind of thing. Most are expensive and/or obscure in implementation though (a notable exception being IKEA’s TRÅDFRI), and I’m a bit of a security freak.

This hack solved my problem for a fraction of the cost (and a multiple of the fun). Sure, a prankster neighbour with an RF transmitter could have some fun with my lights - but I’d rather deal with that than have a potential backdoor for a foreign nation’s cryptocurrency miner inside my home network…