Cordy 2 is an extremely beautiful platform game that I’m playing on the iPad (there is an Android version as well). The game is fast/challenging at the right measure (at least for my taste) and does its best to offer decent controls on a touch screen.
Levels are managed in the Angry Birds style (you earn 1-3 stars according to your performance on each level), but “cost” mechanics ensures you put some effort in a few of them to move forward. Tutorials are very short and mostly skippable, and game dialogs are kept to a minimum. Overall, you just play the game and have fun (a hard-to-find concept in recent games, I guess.)
The fact that you don’t really “die” (at least I haven’t so far) initially made me afraid the game was too easy. But using other types of punishment (like sending you back a bit) works well, pretty much like the old LucasArts adventure games “no death/no dead end” policy gave them a playability edge over Sierra titles and other predecessors.
My only complaint is that I miss hardware controls for platform games (regardless of how beautiful they are on the Retina display). I bought a Nintendo 3DS precisely for that reason, but never found a great platformer for it (or any title that breaks the “ok, but not as shiny as the original” impression).
The only thing that keeps my Nintendo portable running are the Mii Plaza StreetPass-based mini-games, the ultra-polished Mario Kart 7 and the faithfully recreated Twin Bee. New SMB2 had everything to change that, but the “you-suck-let’s-make-you-Invincible-Mario” crushed the experience for me.
Back to Cordy 2: maybe it’s not for the hardcore gamer, but overall I find the $5 was money well spent. As usual in iOSland, you can try a few levels before making a decision – yet another thing that very few titles (and none from Nintendo, I believe) offer on the 3DS.
As a content addict, I’ve always sought tools that ease its consumption, from primitive ones such as PointCast, Plucker and Hands to modern-day RSS aggregators like Google Reader.
Reader’s efficient handling of feeds, flexible ordering (a must for webcomics) and read post tracking pretty much killed competition on this arena years ago. But hegemony is seldom a good thing in software, and bad calls like the stubborn push of a GMail-like UI and the abandonment symptoms (recently explained by an ex-PM) made the retirement announce my personal wake-up call to find a better solution.
After evaluating quite a few self-hosted and third-party options, I chose NewsBlur. It’s a well-crafted (mostly by a single developer), open-source and excellent service, with all the bells and whistles Reader had on its best days. It even includes social features, not unlike the ones one that Google axed in favor of paltry Google+ buttons (which are only useful if your target audience is limited to Google employees and Facebook denialists).
It also packs trainable filters to show/hide content (not my turf, but they seem good), and a nice touch for webcomics and sites with partial feeds: you can set up those to display the original content in-place. The iPad app is also neat – a way better proposition than Reader’s (yet more) anemic mobile browser interface.
Due to the massive influx of Reader refugees, it doesn’t offer free accounts right now, but you can play with a simulated account on their homepage and get a good grasp of the real thing. You have to pay for one year upfront, but it’s only $2/month – a small and more than deserved fee for such a lovely piece of work.
Unless, of course, you believe RSS is dead(*). In that case, never mind.
(TL;DR: if you just want to know how to make ChameleonPI v0.3 work with BerryBoot, jump here)
My Raspberry PI
The Raspberry Pi is a low-priced small computer-in-a-board, built for those who want to tinker, learn and have some geeky fun. The overall experience is quite reminiscent of the hobbyist 8-bit personal computer age – it may be more than a coincidence that the project shares British origins with the Sinclair ZX81/Spectrum and the BBC Micro.
Like many of today’s smartphones and low-power devices, the Pi uses an ARM CPU. This is a fun fact because that architecture was created by Acorn, the very same company that built the original BBC Micro! (the “Model A” and “Model B” boards are a clear pun on the BBC Micro models.)
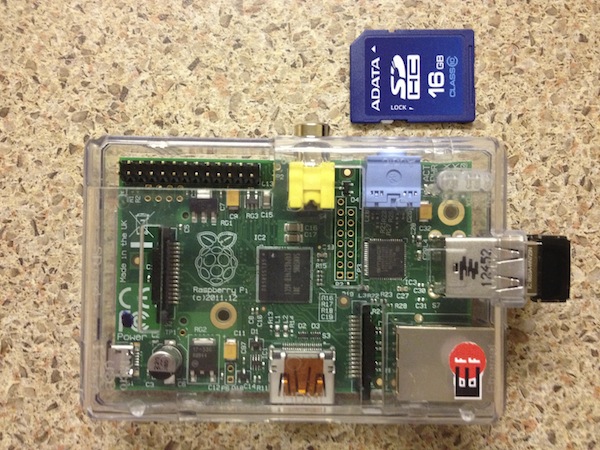
Here is my Pi, close to an SD card (to give an idea of its size). Yes, it’s a full-fledged computer.
Like those old computers, you’ll use any TV or monitor (with its HDMI or composite input), and can play around without fear of breaking them, thanks to the absence of moving parts and the low price. But unlike them, you use SD Cards for storage. They are the dream of the 80′s hobbyist: fast and interchangeable like cartridges, reusable and manageable like floppy disks, and as cheap as cassette tapes (you can find a a 16GB Class 10 for less than $15).
Here is a cost breakdown (in CAD): I spent less than $50 on my board (here), and $10 on the case from the photo (although you can get creative and spend more/less). I used HDMI cables and a microUSB charger I had here (minimum is 700mA; I’d suggest at least 1A), but had no keyboard/mouse lying around, so I got this mini keyboard with trackball (which works fine, but is so short-ranged that defeats the purpose of being wireless).
A cheap Wi-Fi dongle got me wireless for another $15. It all depends on what you already have on your house, but you won’t spend more than you would on, say, an Apple TV – which provides a bit more of convenience, but a fraction of the functionality and pretty much none of the DIY fun.
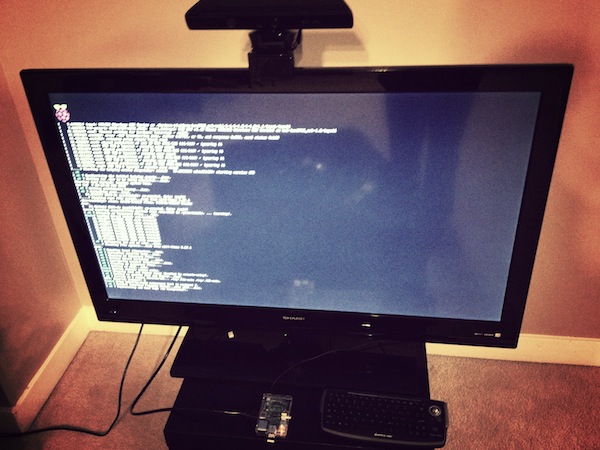
Terrible photo, but a milestone: first boot!
The recommended software to start with is Raspbian, a desktop-like Linux distribution to which you can add anything you want. But several custom-build distros were created for specific applications, like OpenELEC (a powerful XBMC-based media player) and Sugar (containing the educational software that runs on the One-Laptop-Per-Child machines).
But the nerdgasms came with ChameleonPI – a collection of emulators for dozens of old-school platforms. Apple II, MSX, ZX81, Spectrum, C64, Arcades (MAME), GameBoy, NES… you name it, ChameleonPI has it. Just throw your ROMs/DSKs/TAPs (or a willingness to write BASIC code) and have fun!
Swapping cards is easy, but can be cumbersome and waste space, which makes BerryBoot useful: it hosts multiple distros on the same SD Card, showing a (customizable) menu for you to pick them. It also downloads most of the popular ones, straight from the Pi, with a couple of clicks. Linux geeks: it’s like apt, but for distros!
Unfortunatelly BerryBoot does not support ChameleonPI. You can add it manually (following the instructions), but BerryBoot expects a two-partition distro (and only uses the second, as the first one is the always the Raspbian boot partition). ChameleonPI v3 added a third one, allowing non-Linux users to copy ROMs to the SD card.
Since I’d rather use Wi-Fi to copy anyway, I tried to go without it. However, some of the emulators (notoriously LinApple) missed the directory structure – and I also could not write to /roms (the mount point for the partition). Here is what I did:
Steps to add ChameleonPI v0.3 to a BerryBoot SD
Download ChameleonPI and follow the instructions to add a custom system (ignoring that you’ll see three lines instead of two on the first step; keep using the second one);
Extract ChameleonPI to a separate SD and create a .tar.gz file with the contents of the FAT partition – it’s the one with AUTOEXEC.* files on the root and a lot of directories with old computer names;
(alternative: download my copy of the ChameleonPI v3 FAT partition)
Save that file to a pen drive/USB stick/external HD;
Plug the pen drive on the Raspberry Pi;
Boot the SD card with BerryMenu and select ChameleonPI.
Press T to open a terminal;
Ensure you can write to the /roms directory:
sudochown zx /roms
Also make sure the mount point for the pen drive is there:
(thanks @_47Ronin_ for pointing that out):
sudomkdir-p/roms/USB
Type exit to return to the ChameleonPI menu, then T again, and check if it mounted the pen drive (otherwise reboot and T again until the command shows some files):
If everything works, LinApple will allow you to select a disk image pressing F3 (instead of crashing for not having the directory where it expects). You will now also be able to connect via Windows Network to your Pi (use the user zx and password spectrum) and mount the roms folder, not the zx one.
Also be aware that these instructions were tested with ChameleonPI 0.3, not with 0.3.1 (which is giving me a hard time to mount anywhere outside the Pi).
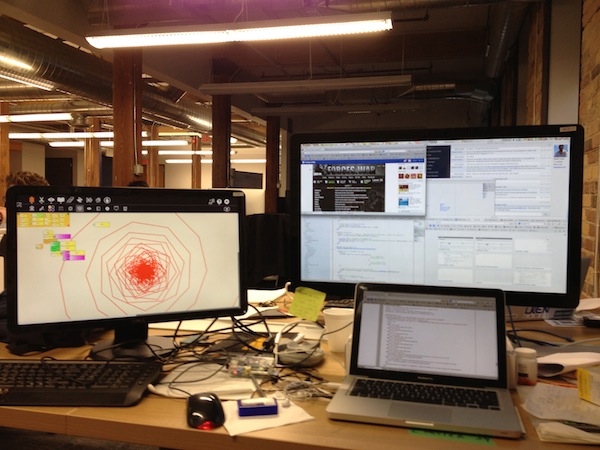
Yes, I brought the Pi to Uken – why not doing turtle graphics alongside Rails?
Tips and Tricks:
You can do the image conversion (the “instructions” of the first step) on the Pi itself – it is way slower than any Linux desktop, but will work if you leave it working during the night as I did – just apt-get the software mentioned
XBMC becomes way more useful when you add Fusion (so other plugins can be added via the network)
All distros recognized my Wi-Fi dongle on-spot, but configuring the network can be tricky. OpenELEC adds an option with its own name on XBMC, under “System”, but some distros will require you to add your network to wpa_supplicant.conf (BerryBoot has it straight on the setup menu, others will look for it in /etc/wpa_supplicant/).
In any case, adding a block like this to the existing file should be enough:
Make sure you set up the Wi-Fi (or have Ethernet plugged) because the Pi lacks a battery-backed clock, and needs to be online to show and use the correct date/time.
I’m very excited with this: at last a publisher launched a tablet-friendly, fixed-price digital comics service. For a monthly fee of $10 (or an yearly $60), Marvel Unlimited gives you access to a library of 13,000 comic books, both on computers and on iOS devices (with Android coming soon), just like Netflix or Hulu!
Imagine reading Secret Wars (I and II), House of M, Muttant Massacre and another couple arcs, all on a single day if it fancies you, for no extra fee. I’ve jumped into the yearly subscription (before they change their mind on the 50% discount), and my first impression after browsing the library and reading a few books is quite positive.
The app has a decent browsing system – you can easily search your favorite author, character, or all comics in an specific arc. The comic reading part does its job, but has some “1.0-isms” like a toolbar that never goes away while you are reading the comic. Come on, Marvel – every pixel matters! It also has a hard time remembering what I was reading and the page when the app is closed, and the download-in-the-background system is nowhere as mature as, say, comiXology‘s. Overall, it covers the basics, and the other aspects can (and should) be improved over time.
As expected, it is DRM-heavy. You can’t do anything with the comics outside their app or webiste, and they will vanish if you cancel your subscription. My view is the same I apply for any DRM-based media providers (yes, that includes Kindle books): they are not for those who want to own content, but rather for people who need access to it. Collectors should look elsewhere. As for myself, I’ve owned my share of shelves crammed with comic books, demanding physical space and special care. I went digital with comiXology precisely to get rid of that, and Marvel’s offer is a good complement to that.
On comiXology, Marvel/DC charge an extra dollar for the last issue of any series. That avoids positioning the service as a a death blow for comic shops, and also preserves their cash cow: hardcore fans that can’t wait a second to read the latest issue. Here they go a step further by delaying around six months. May be a showstopper for those who need to witness the latest, this-time-irrevocable death of the month, but I can wait to read it at the time the character returns to life, no biggie. And the best thing for me anyway are the older series I used to have on paper (that would cost me an arm and a leg to buy), and those are where Unlimited shines.
Another thing people are complaining about is the cap of having only six comics donwloaded for offline reading (another “6″? Did they put Mephisto in charge?) Granted, six 24-page comics won’t do it on an intercontinental flight, or a cross-country trip (on large countries, at least), but most people don’t do that really often, and you can always purchase a couple of collected arcs on comiXology on those occasions. Six issues can, however, cover the longest commute or the most relaxed afternoon in the park or single-person meal (for those into the fine art of reading while eating). And you can always hunt for a Wi-Fi connection if you need an extra fix on the go!
Granted, 13,000 issues with the 6-month delay and 6-issue offline cap is far from being “unlimited”. But, for me, the ability to read any of these issues anytime, without worrying about physical space, collected dust or moving logistics is much worth the $5/month cost of the yearly subscription. I seriously recommend using it on a Retina-enabled iPad, as I don’t like manual or automated zooming. On the other hand, once the Android version is launched, devices with SD slots and comparable displays like the Nexus 10 might become the best choice for serious comic fans, as comiXology (which allows you to download as much as your device can handle) will remain the equivalent of iTunes for this media.
Overall, this will be a weekend to remember, since I intend to spend it read comics until my eyes pop out. Life is good.
I have always cherished Sam & Max Hit The Road as the best point-and-click adventure of the “LucasArts years”, but I had no idea that it had started as a comic book, nor that it had spawned its own animated series.
And most of all, I was unaware that some former LucasArts employees formed Telltale Games to bring back those awesome games. They have built a new 3D engine that brings the classic mechanics to the 21st century. I discovered that just as I was moving to Toronto, so I decided that once I settled at my new home, I’d catch up.
I cut my teeth on the new stuff with Season 3 – mostly because it was available for Mac OS on Steam. Got a few spoilers, but instead of turning me off, they made me more interested in finding out what happened by playing the previous games than otherwise. I also needed a refreshment, so I gave the original game a spin on ScummVM (an awesome implementation of the LucasArts engine for modern computers.)
Once I was convinced that the new games had the soul of the original one, my wish was to start from Season 1, but it’s only available on Windows, Wii and XBox 360. But Season 2 was released on the iPad. Honestly, I was sure that a game so strongly based on mouse-hovering would flop without a mouse to hover with, but hey, it was only $3 per episode. Worth a try.
To my surprise, the “wheel” system (depicted as an actual car wheel, in-line with the series’ tongue-in-cheek spirit) is arguably better than the mouse. It gets rid of the annoying pixel-hunting that adds little to the challenge, and comes with a bonus: muti-touching the screen reveals all clickable areas.
Happy with that, I played the whole Season 2 in a couple of weeks or so. It gave me a fever, and the only prescription was, of course, more cowbell. Being a Windows-free person, the reasonable alternative to play Season 1 was to get an XBox 360 (and also a TV set – at the dawn of the on-demand video age, I had not yet bothered to buy one)
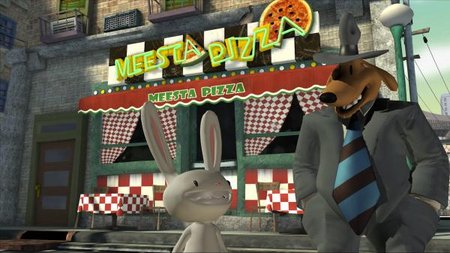
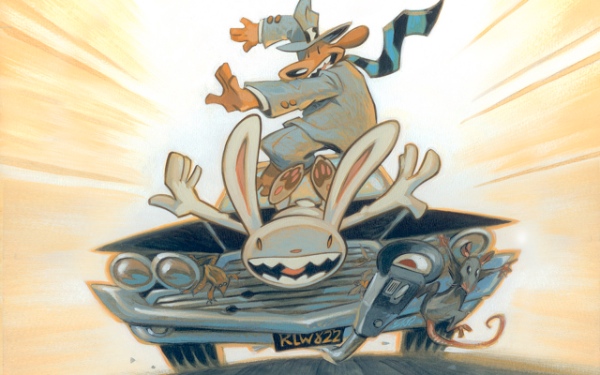
(any idea on the author of this image?)
The biggest disappointment of the XBox 360 version (available online) was to find out that it uses the traditional point-and-click system, which doesn’t work as well on a gamepad. They could have at least added directional movement to one of the analog sticks. I also found the puzzles a bit too easy on the first few episodes, but overall fun. And at least I got to know how Max got his “career upgrade”.
But Sam & Max is not all about games: I’ve read Sam & Max: Surfin’ the Highway massive collection of comics on comiXology, written and drawn by Steve Purcel himself, and watched a couple episodes of the Sam & Max: Freelance Police cartoon on iTunes.
The comics are awesome – I can’t help but link Steve Purcell’s style with Wally Wood works at MAD Magazine, and the source from the zany ideas and humor on the games becomes clear. Not for everyone, but I found it quite entertaining.
For the cartoon, however, I had mixed feelings. First of all, the voices are quite different from the games – which also present slight variations, but always on recognizable styles. I also felt a certain washing-down of the tone which, along with the out-of-place characters, which smells like network executives “developing” the product. Still, it’s Sam & Max, so it’s good! :-)
Anyway, with several Season 1 and Season 3 episodes yet on the pipeline I still have some fun ahead (before joining the crowds asking for a Season 4), and I recommend the games (and comics) to anyone that enjoyed the original, and also for those with a taste for puzzle-solving and non-orthodox humor.
Mudar de país envolve um monte de pequenos detalhes. Assim como fiz no post sobre o processo do visto de trabalho, estou colocando neste os passos que dei ao chegar no Canadá até me considerar estabelecido: tirar documentos, abrir conta em banco, arrumar uma casa e coisas do gênero.
Novamente vale avisar: esta informação não é oficial. Muito só se aplica a temporary workers, ou só a quem vem pra Toronto, ou só pra quem é o Chester. Minha intenção é das melhores, mas você tem que avaliar as diferenças do seu caso e sempre procurar a** informação oficial e atualizada**.
Quem vai para o Canadá através de uma oferta de trabalho (ao invés dos já conhecidos processos de imigração) precisa solicitar um visto de trabalho. O site oficial explica em detalhes como fazer isso, mas resolvi documentar alguns detalhes que aprendi solicitando o meu.
Devo lembrar que não sou especialista no assunto e não tenho nenhuma relação com o governo do Canadá – apenas passei pelo processo e resolvi compartilhar o que aprendi. A sua experiência pode ser diferente, pode ter mudado tudo, se informe. Se tiver compreendido que não me responsabilizo por nada sobre o seu caso, continue lendo sobre o meu.
Na minha breve (e ainda não definitiva) passagem por Toronto tive a chance de participar do Facebook HACK – Toronto. Já tinha participado de eventos desse gênero no Brasil (como o RHoK-SP e o Yahoo! Open Hack Day BR), mas essa foi a primeira vez em outro país. E foi bem bacana!
A maior diferença é que no Canadá os caras são organizados: as coisas começam e terminam no horário anunciado. De resto, é tudo igual: camaradagem, troca de informações com uns ajudando os outros, vários times se formando na hora com pessoas que se conhecem ali mesmo, como nos eventos daqui.
O pessoal mandou muito bem nas instalações e na comida (almoço, jantar, comidas de gordo e cerveja no fim do dia à vontade) e as palestras introdutórias foram úteis. À tarde o pessoal mais interessado em business stuff acompanhou palestras em outra sala, e os programadores ficaram no hackaton.
Um ponto negativo é que o evento é de um dia só. Com as palestras e o almoço, só restou o período da tarde para o hackaton em si – bem pouco, em particular quando se está aprendendo novas tecnologias/APIs. O outro revés foi a internet ruim (que não é um “privilégio” dos nossos eventos) fazendo muita gente (como eu) não terminar suas demos em tempo, além de dificultar a vida de quem ia demonstrar.
Mas hacking é improviso, e no final o pessoal conseguiu mostrar um monte de aplicativos que, embora em implementações simples, demonstravam conceitos bacanas que podem dar jogo no mundo real. Na minha opinião, esse é o segundo maior objetivo de um hackaton, ficando apenas atrás do aprendizado.
Pra mim o melhor foi poder brincar com coisas novas (Open Graph, Custom Actions, Single Sign-On em mobile) sem a pressão de um projeto “real”. Continuo recomendando esse tipo de evento, e espero continuar participando onde quer que eu esteja – afinal, hackers são hackers em qualquer lugar.
Juntamos Boston e Montreal ao roteiro e incluimos viagens bate-e-volta para Washington e Quebec City, o que resultou em uma viagem que eu não podia deixar de registrar.
Hospedagem e Transporte
Para fazer uma viagem tão extensa, tentamos economizar na hospedagem. Por exemplo, em Nova Iorque tudo o que queríamos visitar estava em Manhattan, mas era jogo ficar em um hotel mais em conta no Queens e pegar o LIRR (trem expresso que aparece no filme Brilho Eterno De Uma Mente Sem Lembranças) todos os dias.
Também buscamos hotéis baratos em Boston, Toronto e Montreal, sempre tentando ficar próximos do transporte público. Na última trocamos o hotel por um apartamento alugado para a semana. Foi bacana: além da economia, a gente acaba fazendo compras, cozinhando, enfim, vivendo mais o cotidiano da cidade.
As quatro cidades disponibilizam passes semanais, que permitem andar à vontade de ônibus e metrô, e Toronto também integra os bondes. E estes mostram até onde vai o respeito ao pedestre: quando o bonde pára e existe uma pista entre ele e a calçada, os veículos também param para as pessoas entrarem e saírem do bonde. Imagine isso aqui – morreriam uns vinte usuários atropelados por dia. Por outro lado, lá também tem lavagem semi-compulsória de pára-brisa.
Eventos
Na Boston Comic-Con o ponto alto foi assistir Feldstein, um documentário bacana sobre o editor da MAD, com participações que incluíam o Sérgio Aragonés (que eu tinha visto na WonderCon) e o Al Jaffee, autor das famosas “dobradinhas MAD” (que ele, aos 91 anos, continua fazendo mensalmente) e “respostas cretinas para perguntas imbecis“. E me surpreendi ao ver que o próprio Al Jaffee estava quase do meu lado assitindo ao filme! Outro ícone presente foi o Peter Bagge, mas eu estava tímido e só tirei foto de longe.
Em Montreal fomos à Star Wars: Identities, uma exposição imperdível para fãs da série. A idéia é mostrar como as experiências e escolhas moldam uma identidade (real ou virtual), com foco particular em Luke e Anakin Skywalker.
Os visitantes recebem uma pulseira que pode ser usada em diversos pontos da exposição para responder a perguntas (tocando nas paredes e terminais apropriados). Isso permite ao sistema deles criar a história e o visual do seu personagem, cujo link você recebe por e-mail (veja o Chester wookie ou a Bani nautolaniana).
A brincadeira é acompanhada de dúzias de apresentações multimídia, sketches, roupas e maquetes do filme, tudo com narração bilíngue acionada quando o visitante se aproxima de algum setor. Sensacional, se vier pro Brasil eu vou ver de novo!
Estivemos também na The Art Of Video Games Expo em Washington, no Smithsonian. A mostra incluía computadores, videogame, jogos e mini-documentários. Não era tão abrangente quanto, por exemplo, a Game On, mas valeu ter perdido um ou dois monumentos para visitá-la.
A Broadway pede musicais, e dessa vez vimos dois: Spider Man: Turn Off The Dark e The Lion King. O primeiro começa meio devagar (ou eu já estou cansado de ver essa história) mas pega o ritmo na metade, tendo o show roubado pelo Duende Verde. D’o Rei Leão eu nem esperava muito, e me surpreendi: é um dos melhores que já vi!
Passeios
Em Nova Iorque fizemos o passeio de barco que faz a volta em Manhattan (na verdade um semi-círculo: a volta completa demorava 3h e acrescentava pouco). Dá uma ótima visão da Estátua da Liberdade e dos outros marcos da ilha (incluindo as obras avançadas da Freedom Tower). Um lance divertido foi pegar os profissionais da Fao Schwartz dançando no piano:
Boston é uma cidade grande, mas agradável (eu moraria lá sem pestanejar), cuja história atrai muitos turistas americanos. O passeio legal é o Freedom Trail, um caminho sinalizado no meio da cidade, através do qual você visita a pé diversos marcos históricos. Também fomos ao campus do MIT, e ficou claro porque tantas coisas legais saem de lá. A Bani até fez amigos no clube de origami, e acabou trocando o dia na Comic-Con por uma palestra sobre “Origami e Matemática, mas principalmente Origami”. #nerd
Washington é uma espécie de parque temático do Capitão América, onde você vai encontrar clássicos como o Lincoln e o Capitólio (que exige visita agendada, mas dá pra ver o básico e almoçar lá sem agendar). Optamos por um tour de ônibus que permitia descer e subir à vontade, e com ele deu pra conhecer tudo em um dia.
Toronto e Montreal nos divertiram com os shoppings subterrâneos (PATH e RÉSO, respectivamente), mas na primeira também visitamos a Casa Loma (onde fica a famosa escadaria do Scott Pilgrim). Pulamos a CN Tower (é legal, mas já tínhamos subido antes) e no geral batemos perna pelas duas cidades (usando o excelente transporte público, que dá conta mesmo no horário de pico).
Montreal não teria sido a mesma sem a prestatividade do Mikio e da Cris, que nos levaram de alto a baixo: com eles comemos bem, aprendemos os fundamentos do francês quebecois (posto à prova quando, com cólicas, precisei explicar o que era um Buscopan na farmácia), visitamos um cassino fora da ilha e até fizemos um agradável bate-e-volta até a Cidade do Quebec. Eles também deram as dicas para conhecermos o centro histórico, o porto e o diversificado Quartier Latin, onde você encontra duaslojas de jogos de tabuleiro, uma só de mangás e outra especializada em produtos de cannabis – todas na mesma rua!
Comida
Uma semana nos EUA sem gordices era impraticável, ainda mais agora que não ando estritamente vegetariano. A redescoberta dos chicken fingers (em particular do KFC e do Friday’s, comuns por ali), aliada a duas visitas ao The Cheesecake Factory de Boston me trouxeram de volta 2,5 Kg mais longe do meu peso ideal.
A gastronomia tomou boa parte do passeio no SoHo, com dois lugares ótimos: o Lombardi’s, que alega ser a primeira pizzaria da cidade (sem dúvida é das melhores) e o Rice to Riches, que serve arroz-doce nos mais diversos sabores, acompanhado de mensagens motivaicionais em prol do jeito glutão de viver.
No Canadá mantivemos o ritmo, já que Toronto tem bastante restaurantes legais na King e na Queen, além de opções garimpáveis onde estávamos hospedados (ao longo da Spadina em Chinatown). A Nat e o FZero gentilmente nos levaram ao La Palette, no qual experimentei carne de javali e até de cavalo (esta última parece a bovina, o gosto é bom); jantei com o Guilherme Blanco e a Sara no Drake Hotel; e o Cauê Guerra nos apresentou ao Dazzling, que tem várias especialidades asiáticas – escolhemos comida tailandesa e não nos arrependemos.
Em Montreal almoçamos com o Rafael Rosa Fu na ilha vizinha, a Île des Soeurs, mas a refeição mais curiosa aconteceu no Schwartz’s: a fila na porta desanimava, mas do nada dezenas de pessoas entravam! O que rola é que o lugar foi pensado para atender os trabalhadores nos anos 30, então tem todo um esquema: as pessoas sentam na ordem de chegada, em grandes mesas estilo refeitório. Os pedidos são pegos na ordem e entregues da mesma forma. Apesar de tudo ser feito com total cordialidade (e do sanduíche defumado justificar sua fama), era inevitável lembrar do Soup Nazi e dar umas boas risadas.
Fotos
Acho que não deu pra falar nem metade do que a gente fez – foram três semanas em ritmo acelerado. Mas fotografamos tanto quanto deu, e pra quem quiser saber mais, eis os álbuns:
Se o Laerte é o mais sofisticado dos quadrinhistas nacionais, o Angeli é de longe o que mais me influenciou. Quase tudo o que eu lia/ouvia no final dos anos 80 vinha pela Chiclete com Banana, e sua crítica social e de costumes me mostrou um mundo bem maior que a vidinha católico-suburbana que me cercava. Uma visita à exposição exclusiva do autor era mais do que obrigatória!
O local não poderia ser mais apropriado: a Avenida Paulista simboliza bem a metrópole onde viveriam um Bob Cuspe ou uma Rê Bordosa. A exposição fica em um espaço escuro, reproduzindo a realidade do Angeli, que (dizem) chega a ficar vinte horas num dia “trancado” no estúdio, desenhando. Tem até uma maquete:
O principal elemento são as tiras e cartuns, expostos em murais, gaveteiros e até em uma geladeira. Dá pra passar um bom tempo (re-)lendo e observando detalhes que se perdem no papel-jornal. Tambem curti a reprodução do clássico cenário de janela em uma janela real, e a recriação de discos de vinil com capas do autor – quem só vê álbuns no Cover Flow precisa experimentar a sensação das “bolachas”.
Na área “reservada para maiores” (decorada com iluminação e textura sugestivas) destacam-se doispainéis enormes, uma maquete da morte da Rê Bordosa (que, como a mencionada acima, é do curta Dossiê Rê Bordosa) e cópias ampliadas das fotonovelas da Chiclete.
Painéis com capas da revista e fotos do autor encerram a exposição, que deve agradar a qualquer fã. A popularidade do Angeli é confirmada pela lotação no fim-de-semana. A dica é ir durante a semana – salvo excursões-relâmpago escolares, é bem tranquilo.


")
 Quem vai para o Canadá através de uma oferta de trabalho (ao invés dos já conhecidos
 ")

 A
A ")


